


I can’t believe I’m actually saying this, but… our DIY half bathroom is DONE! After two months of squeezing in work during naps, late nights, and weekends, this little space is officially complete. And honestly? I can’t wait for friends and family to walk in and see (and feel) all the love we poured into it.
When we bought our 1949 New England classic cape this past spring, we knew we had a fixer-upper on our hands. The house has great bones, but every single room needs updating. We decided to start with the first-floor half bath as our first DIY project—not only because it’s the bathroom guests will use most, but also just for our family as we hang out downstairs during the day.
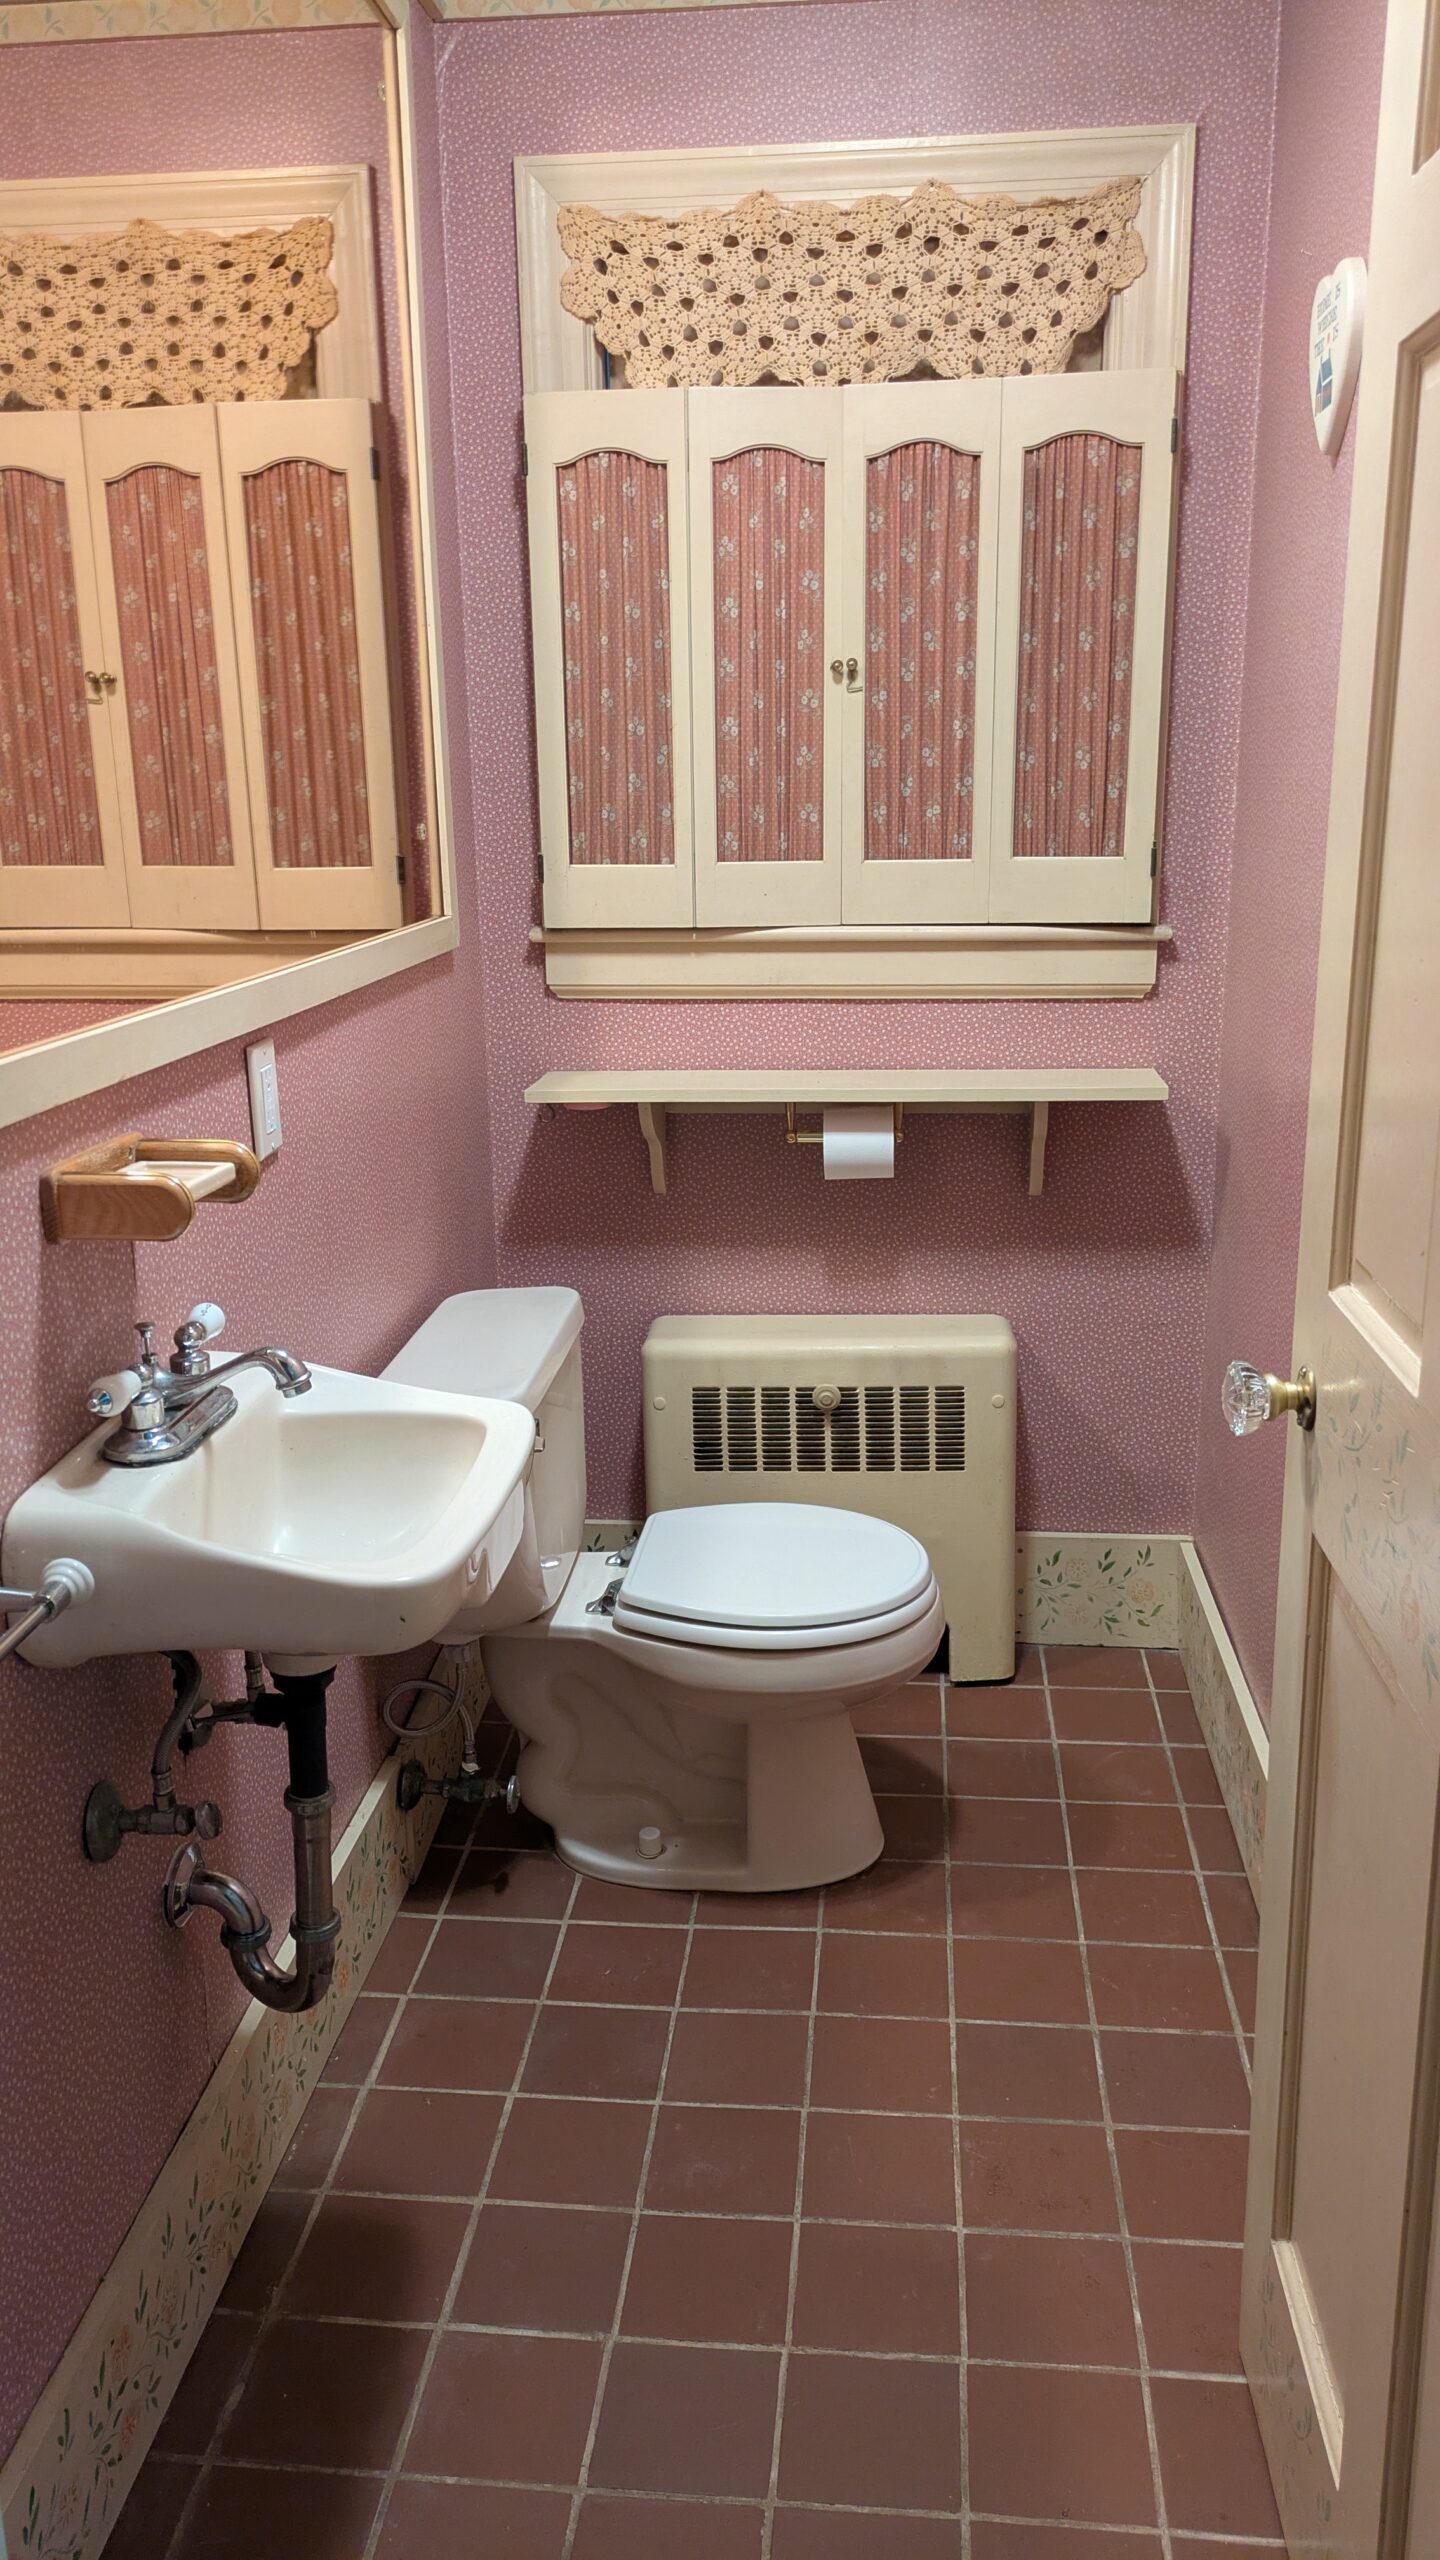
Now, let me tell you… this bathroom had not been touched in over 40 years. Think dated pink everything—wallpaper, shutters, fixtures, even a teeny-tiny sink that wasn’t very functional. Honestly, I used to walk past our half bathroom as quickly as possible because it kind of spooked me out.
But fast-forward to today, and the transformation is night and day. We modernized this half bath while keeping just the right amount of old-home charm.
DIY Half Bathroom Makeover Inspo
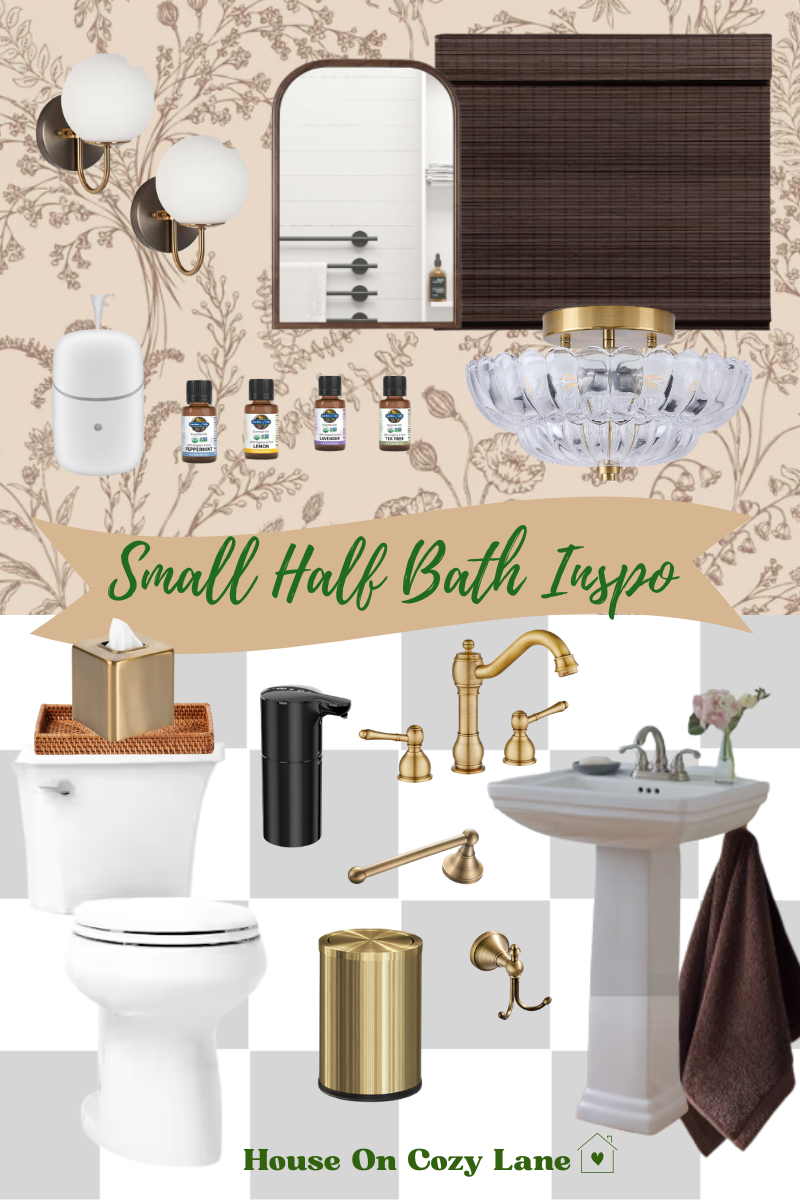
Kohler Round Seat Toilet // Rattan Vanity Tray // Soft Brass Tissue Paper Box // Small Gold Trash Can // Cordless Bamboo Roman Shade // Semi Flush Mount Ceiling Light // Waterless Plugin Essential Oil Diffuser // Garden of Life Essential Oil Set // Cotton Hand Towel 2 Pack // Allen + Roth Pedestal sink // Antique Brass Faucet // Wood Grain Arch Wall Mirror // Automatic Foam Soap Dispenser // Antique Brass Toilet Paper Holder // Brass Bronze Towel Hook // Brushed Gunmetal Glass Globe Sconce // Loomwell Removable Wallpaper // Marble Peel & Stick Floor Tiles // Matte Black Door Knob // Allen + Roth Antique Brass Wall Plate // Allen + Roth Antique Brass Decorator Wall Plate //
Tools and supplies we used for this project:
- Ryobi Planer
- Aluminum Brass Sheet
- Outlet Electrical Box
- Chair Rail
- Trim
- Crown Moulding
- Baseboard
- Shoe Moulding
- Ryobi Brad Nailer
- Black + Decker Corded Jigsaw
- Ryobi Cordless Circular Saw
- Plywood
- Caulk
- Brad Nails
- Kobalt Miter Saw
The Game-Changer: Reversing the Door
The biggest challenge? The door. It opened inward, which meant I was limited to a super small sink. After endless searching, I had a lightbulb moment: what if the door opened out instead? That one simple change unlocked the whole design. We were able to install a beautiful full-size pedestal sink, which instantly made the space feel more functional and elevated.
Starting with a Clean Slate
Once we had the door flipped, we ripped everything out—wallpaper, molding, fixtures, the giant outdated mirror, even the window shutters. During demo, we discovered that there used to be a small mirror with sconces, which was perfect since we were already planning to add sconces!
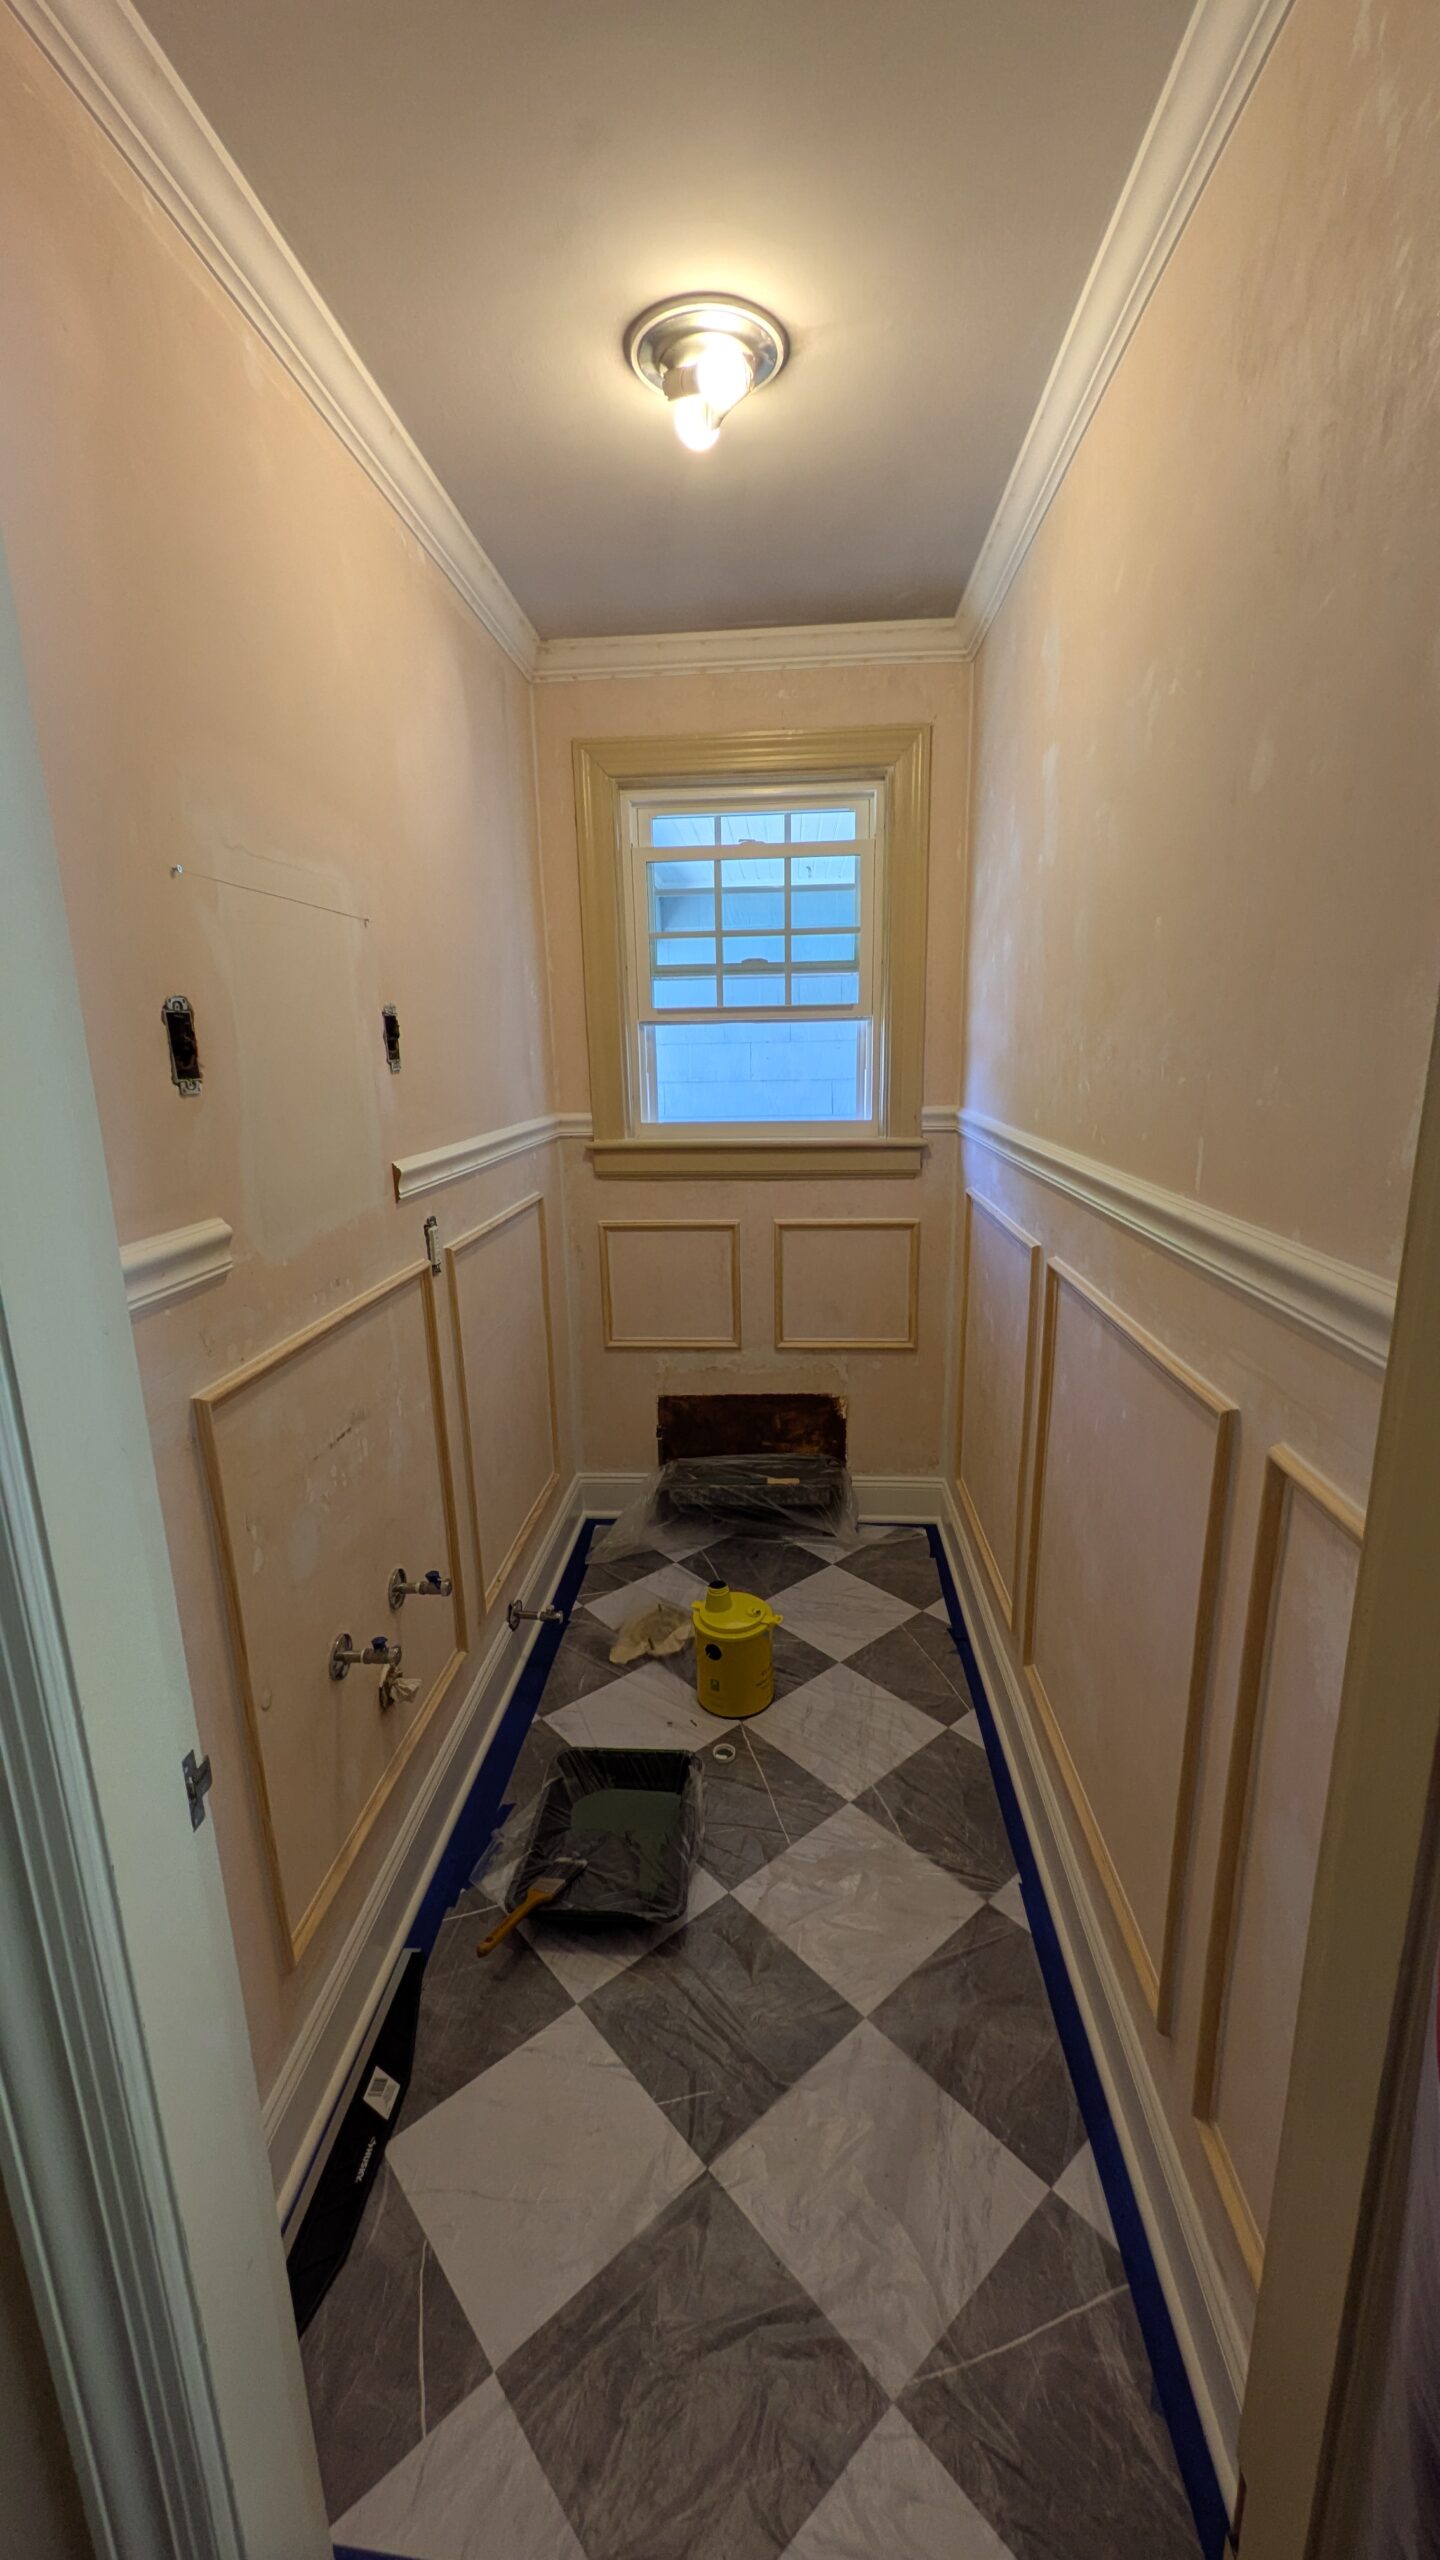
With the space cleared, we started fresh by mapping out wainscoting trim and planning removable wallpaper above it. I went with a removable wallpaper because, let’s be real, I’m known to switch up my decor… and this gave me flexibility without the long-term commitment and the comfort of being a newbie to wallpaper.
Bringing in the New
For the floor, we found gorgeous faux marble peel-and-stick tiles that look like the real deal—super easy to install and such a quick win. My husband also built a custom radiator cover with a brass mesh insert, painted to blend in with the walls. It turned something purely functional into something that actually feels designed.
As for paint, I chose a moody green inspired by nature. It grounds the space beautifully and pairs perfectly with the neutral wildflower-and-butterfly removable wallpaper. Use code houseoncozylane15 for 15% off your order. Once the trim, floors, and paint were in place, the bathroom already felt completely different.
The Details That Made It
We dry-fit the sink and toilet to make sure everything looked balanced, and luckily, we were able to keep the plumbing where it was (huge budget saver). To keep the chaos contained during the messiest phases, we used a dust barrier—seriously, if you’re DIY-ing with kids at home, this is a must-have hack.
Finally, we added the fun stuff: sconces, a new mirror, a pretty ceiling light, gorgeous cordless Roman shade and finishing touches like a brass towel ring, toilet paper holder, and a styled tray with a tissue box. Those small details pulled the whole look together and made the room feel warm, intentional, and done.

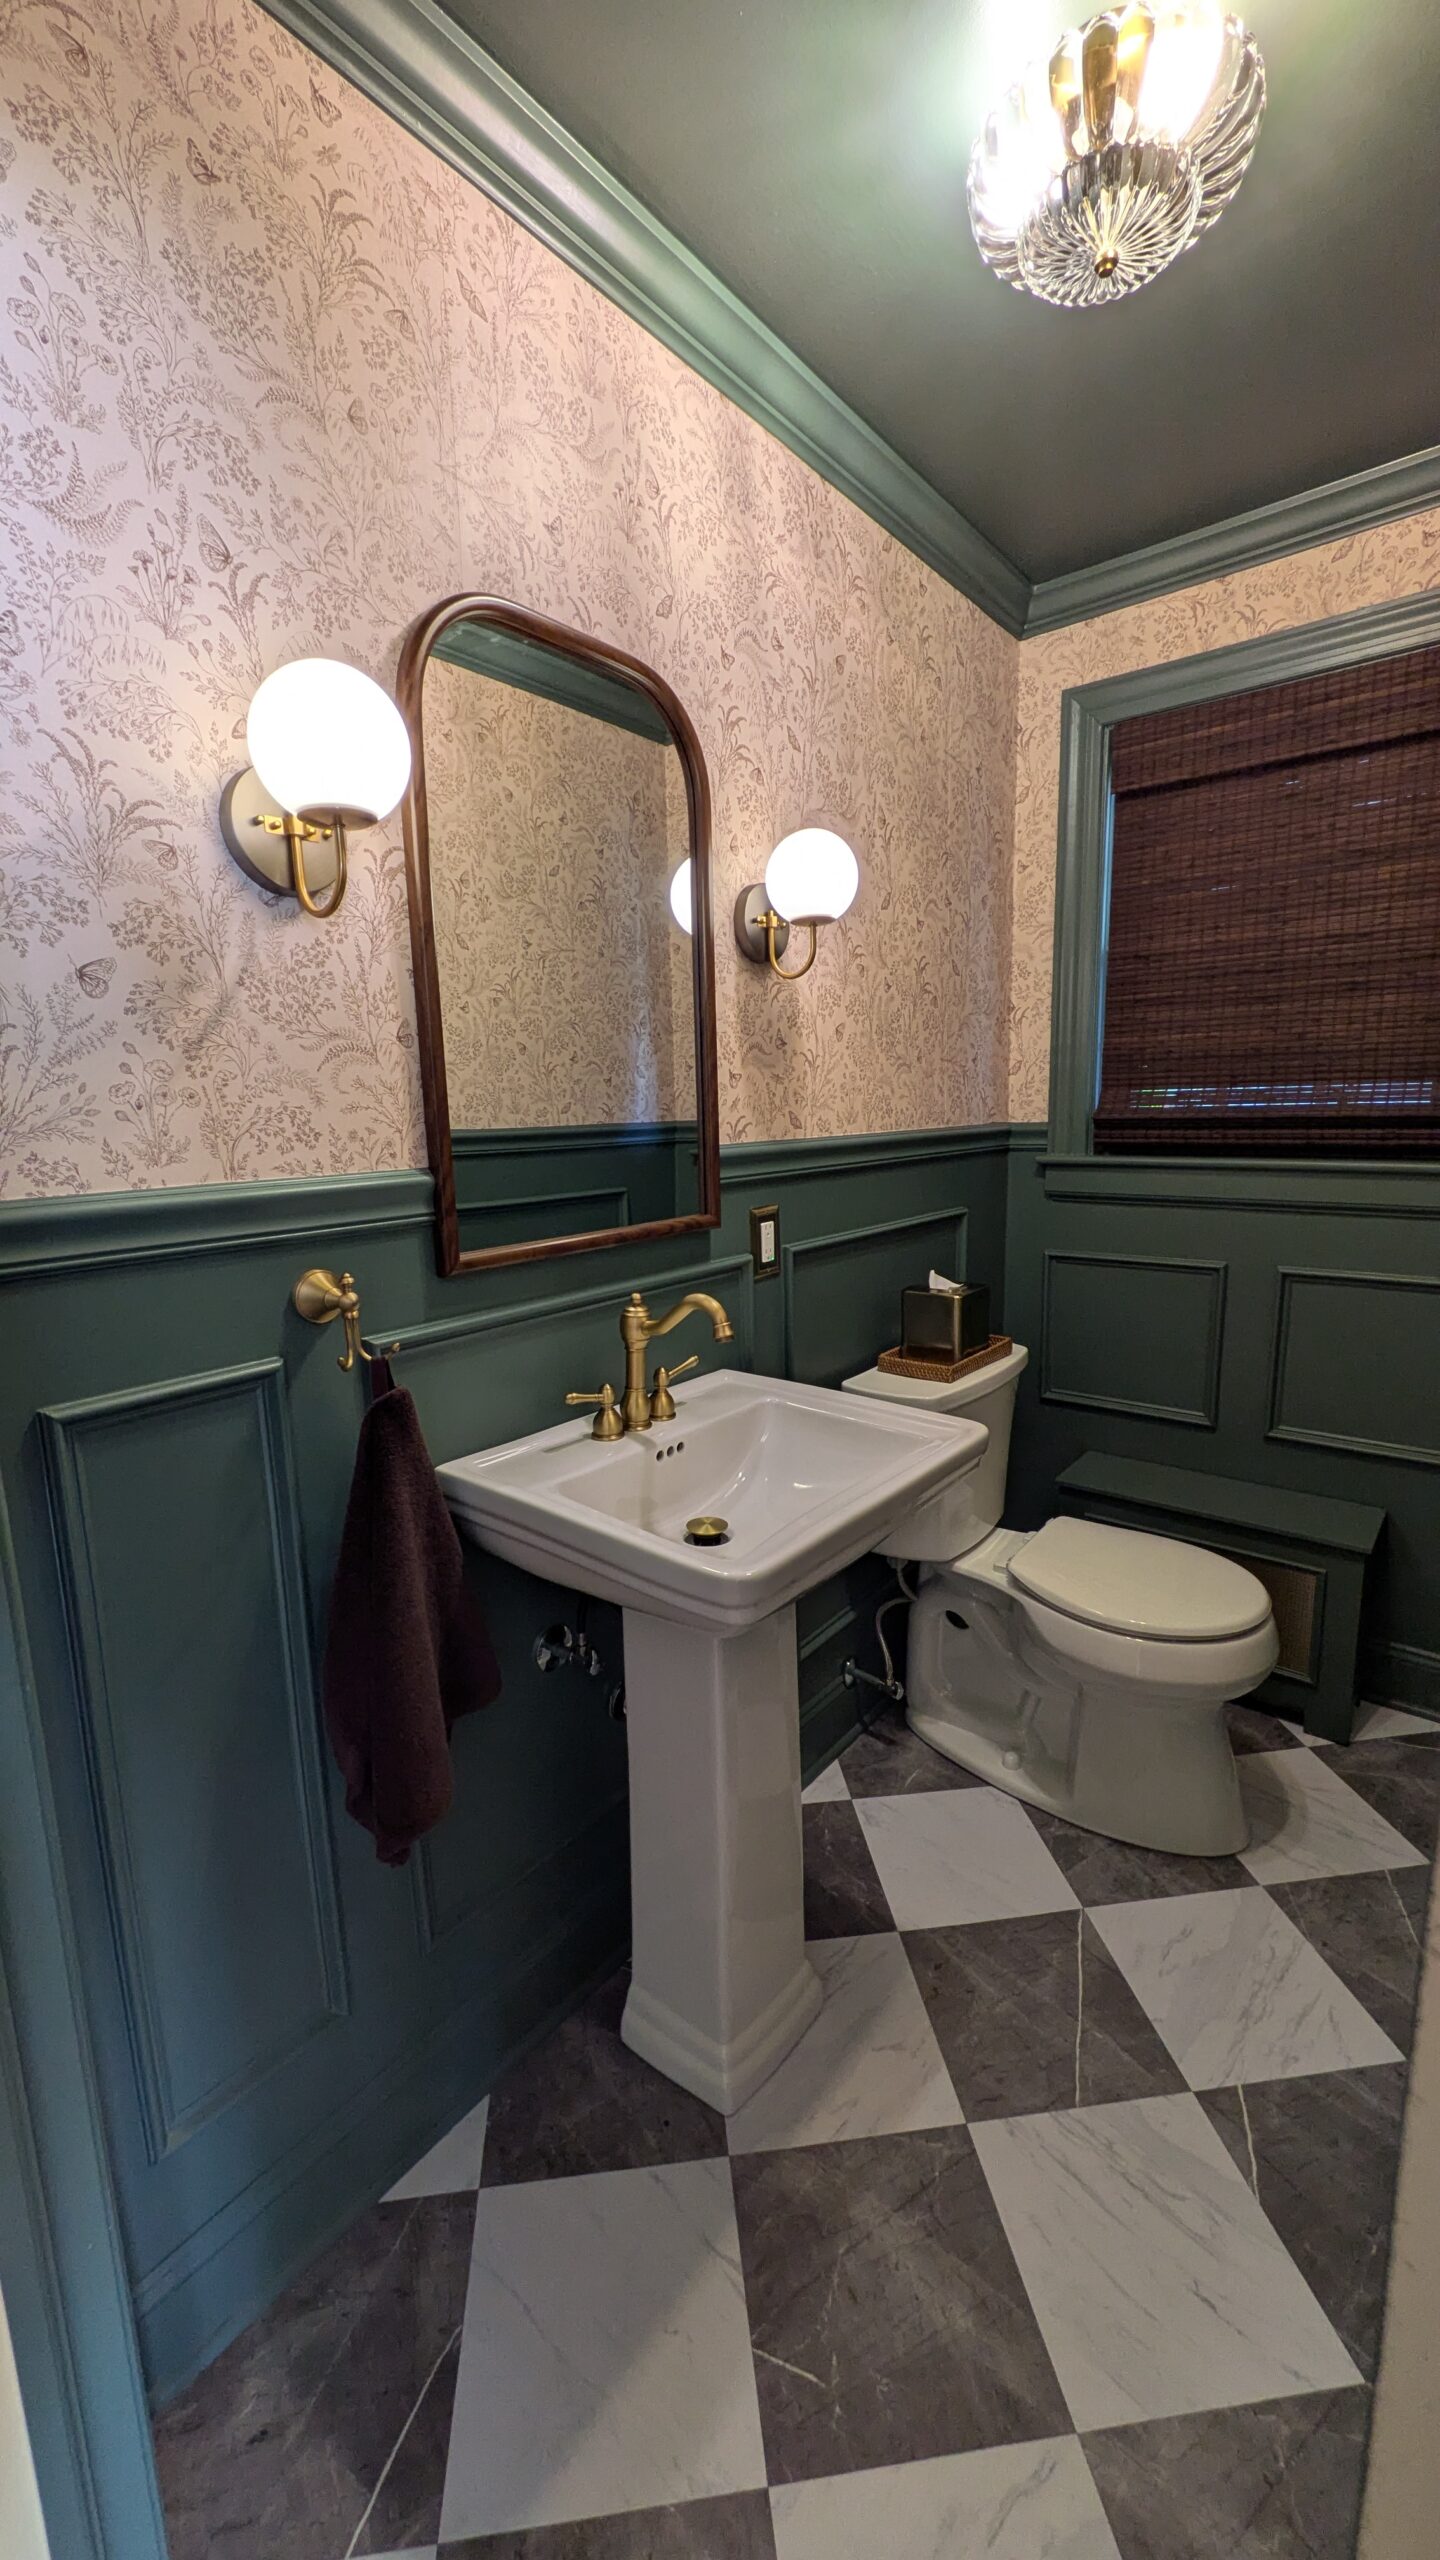
The Final Look
What we ended up with is a moody, cozy, traditional-meets-modern half bathroom that feels like it belongs in this old home—but with a fresh, updated twist. It’s our little labor of love, and we are so proud of how it turned out.
This is just the beginning of transforming our 1,600-square-foot home, so if you loved this bathroom reveal, stick around—more DIY makeovers are on the way!
As an Amazon Associate I earn from qualifying purchases. This post may have affiliate links, which means I may earn a small commission if you shop through them — at no extra cost to you! I only share things I truly love. Thanks for keeping this little blog going!!


+ show Comments
- Hide Comments
add a comment